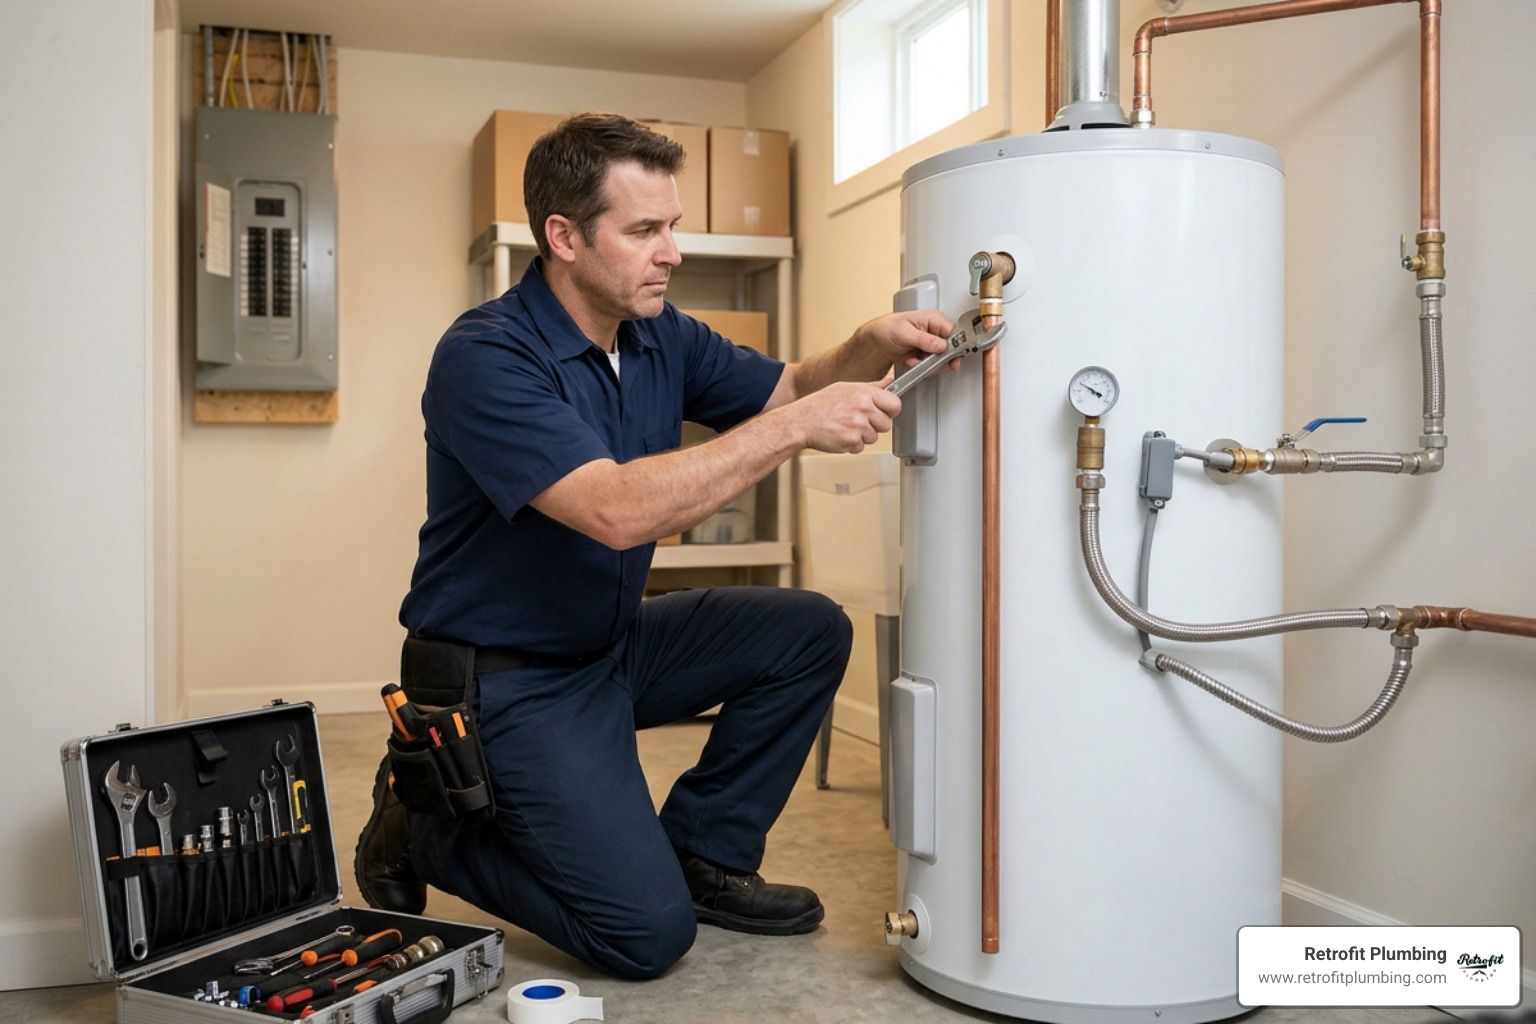
What You Need to Know Before Installing a New Electric Water Heater
Installing a new electric water heater is a project many South Sound homeowners can tackle themselves — but it involves both plumbing and electrical work, so it pays to know what you're getting into before you start.
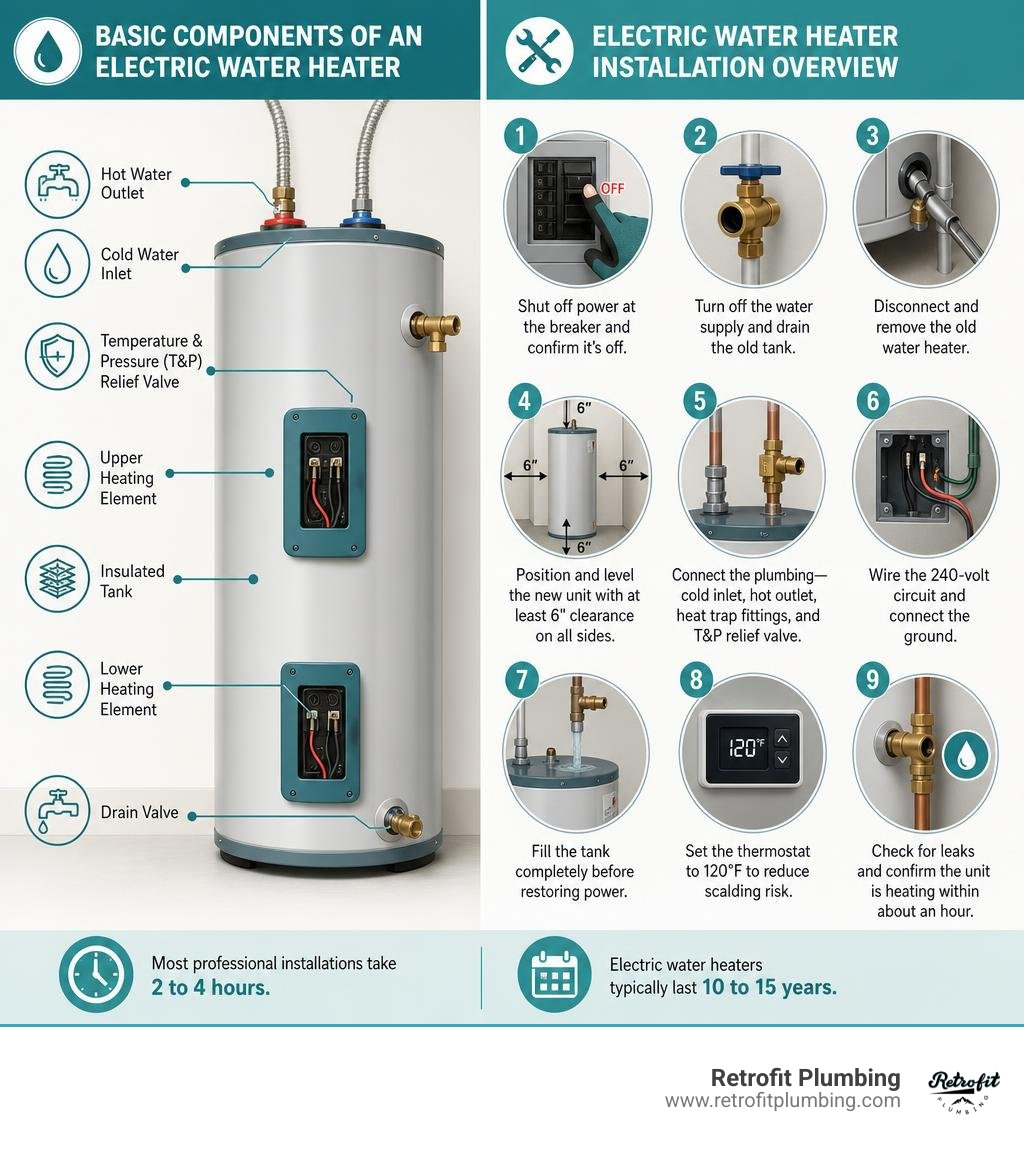
Here's a quick overview of the main steps:
- Shut off power at the breaker and confirm it's off with a voltage tester
- Turn off the water supply and drain the old tank
- Disconnect and remove the old water heater
- Position and level the new unit with at least 6 inches of clearance on all sides
- Connect the plumbing — cold inlet, hot outlet, heat trap fittings, and T&P relief valve
- Wire the 240-volt circuit and connect the ground
- Fill the tank completely before restoring power
- Set the thermostat to 120°F to reduce scalding risk
- Check for leaks and confirm the unit is heating within about an hour
Most professional installations take 2 to 4 hours. A careful DIY swap can take a similar amount of time — or longer if you run into rusty fittings or sediment-clogged drain valves.
Electric water heaters typically last 10 to 15 years. If yours is approaching that range, a replacement now can prevent the kind of urgent, middle-of-the-night failure that no homeowner in Covington, Renton, or Kent wants to deal with — especially heading into fall when demand for hot water climbs.
I'm Josh Klimp, a licensed plumber with over 20 years of experience running a plumbing company serving residential and commercial properties across the South Sound, including plenty of electric water heater installations and replacements. In this guide, I'll walk you through every step of installing a new electric water heater safely and correctly, so you know exactly what to expect.
Planning and Preparing for Installing a New Electric Water Heater
Before you head down to the local home improvement store or order a unit online, you need a solid plan. Replacing a major appliance isn't just about matching the capacity of your old tank. In King County, building codes, spatial footprints, and safety regulations have changed significantly over the last decade.

If you are replacing a unit that was manufactured before 2015, you will likely find that a modern tank with the exact same gallon capacity is physically wider and taller. This is due to updated federal energy efficiency regulations that require thicker insulation. If your current water heater is tucked into a tight closet near your utility room in Bellevue or in a cramped crawlspace in Renton, you must measure your available space carefully before purchasing a replacement.
Additionally, you need to decide whether a traditional storage tank or a hybrid heat pump model is right for you. While hybrid units are incredibly efficient, they require a larger footprint, a minimum of 450 to 700 cubic feet of air space to extract heat from, and a way to drain the condensate they produce. For most straightforward DIY swaps, a standard electric resistance tank is the easiest direct replacement.
When mapping out your project, it is also wise to factor in the financial side of things. Understanding the Electric Water Heater Installation Cost ahead of time helps you decide if doing it yourself makes sense or if hiring a professional is a better use of your weekend.
Local Codes, Permits, and Warranty Requirements in King County
One of the most frequently overlooked aspects of installing a new electric water heater is code compliance. Many homeowners assume that because they are replacing an existing appliance "like-for-like," they don't need to worry about permits. However, because this work involves both high-voltage electrical wiring and pressurized water systems, most municipal jurisdictions in King County—including Covington, Renton, and Bellevue—require a permit and a subsequent safety inspection.
For example, if you live in Kirkland, you will need to comply with specific local rules regarding a Water Heater Replacement. These codes exist to protect your household from electrical fires, water damage, and potential tank explosions.
Key code requirements you must plan for include:
- Thermal Expansion Tanks: Most modern plumbing systems in our region operate as "closed systems" because backflow preventers are installed at the main water meter. When water is heated inside your tank, it expands. Without a thermal expansion tank installed on your cold water line, this expansion causes dramatic pressure spikes that can rupture pipes, damage fixtures, and cause your water heater to fail prematurely.
- Seismic Bracing: Living in the Pacific Northwest means preparing for earthquakes. Washington State code requires all residential water heaters to be securely anchored, braced, or strapped to the wall studs to prevent them from tipping over during seismic activity. You will need a certified seismic strapping kit, typically consisting of heavy-duty metal straps anchored at the top and bottom thirds of the tank.
- Drain Pans and Lines: If your water heater is located in an attic, a finished living space, or any location where a leak could cause structural damage, code dictates it must stand inside a plastic or metal drain pan. This pan must be piped to an approved floor drain or routed outside.
Failing to pull a permit or install the unit to code doesn't just put your safety at risk; it can also void your manufacturer's warranty. Most major brands require proof of proper, code-compliant installation to honor warranty claims on elements or tanks.
Essential Tools, Materials, and Safety Gear
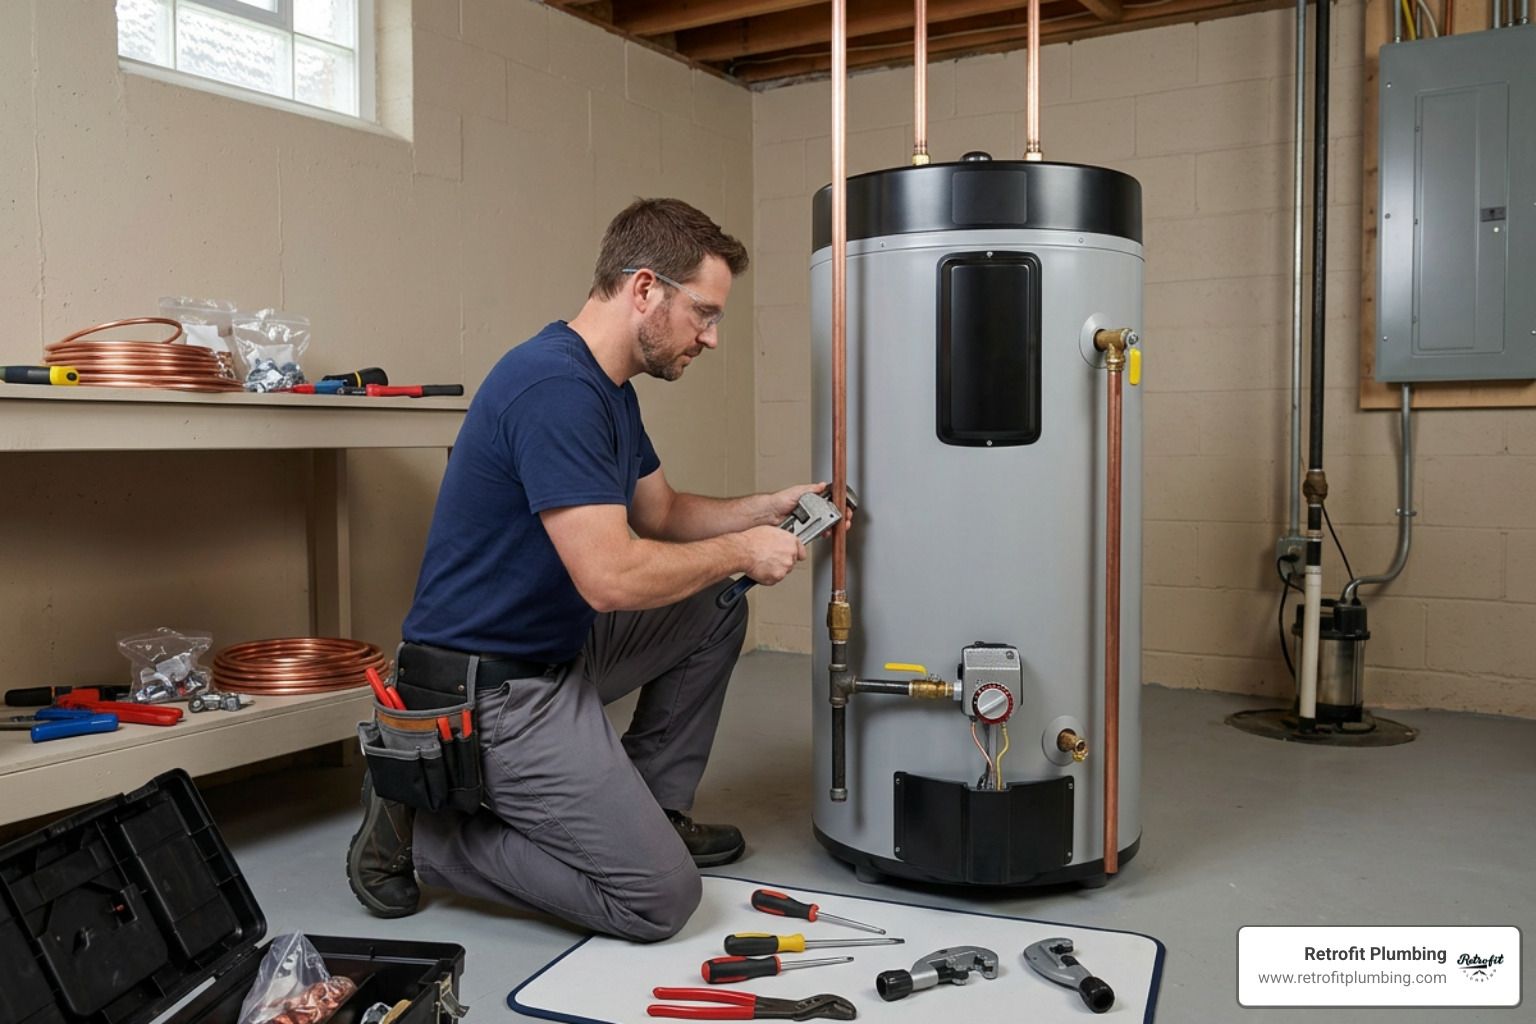
Having the right tools on hand before you start will prevent mid-project runs to the hardware store with your water shut off. Gathering everything on your workbench ensures a smooth, stress-free installation.
For a complete breakdown of the gear you need, you can consult this helpful How To Install A Water Heater: A Complete Step-By-Step Guide - Heater Advisor. At a minimum, make sure you have the following tools and materials ready:
- Safety Gear: Safety glasses, heavy work gloves, and a non-contact voltage tester (absolutely essential).
- Plumbing Tools: Pipe wrenches, tongue-and-groove pliers, a copper tubing cutter, a deburring tool, and emery cloth or wire brushes.
- Electrical Tools: Wire strippers, a screwdriver set, and electrical tape.
- Materials: Teflon thread tape, high-quality pipe dope, flexible corrugated water connectors (or push-fit copper connectors), a T&P discharge pipe, and plastic shims for leveling.
- Ancillary Gear: A standard garden hose, a bucket, and a carpenter's level.
Step-by-Step Guide to Removing Your Old Water Heater Safely
Removing your old unit is often the most physically demanding part of the job. Over years of service, storage tanks accumulate heavy mineral sediment. This buildup makes the tank significantly heavier than its dry weight and can easily clog the drain valve when you try to empty it.
Before you touch a single pipe, read through our detailed guide on Replacing an Electric Water Heater to familiarize yourself with the common pitfalls of decommissioned tanks.
Shutting Off Power and Water in Your Covington Home
Safety is your absolute priority. Electric water heaters run on a dedicated 240-volt circuit, which carries more than enough electrical current to cause severe injury or death.
- Locate your electrical panel and switch off the dedicated double-pole breaker labeled for the water heater (usually a 30-amp breaker).
- Remove the metal access cover on the side of your water heater to expose the electrical junction box.
- Use a non-contact voltage tester on the incoming wires. Bring the tester close to the black and red hot wires. If the tester lights up or beeps, the circuit is still live. Do not proceed until you have located the correct breaker and verified that the power is completely dead.
- Shut off the water supply. Turn the cold water shut-off valve located above the water heater clockwise until it stops. If the valve is old, corroded, or won't budge, locate your home's main water shut-off valve—often found near the street or where the main line enters your home from the Cedar River watershed—and shut off water to the entire house.
Draining the Tank and Disconnecting the Lines
Once the power is verified off and the water is shut down, you need to empty the heavy tank.
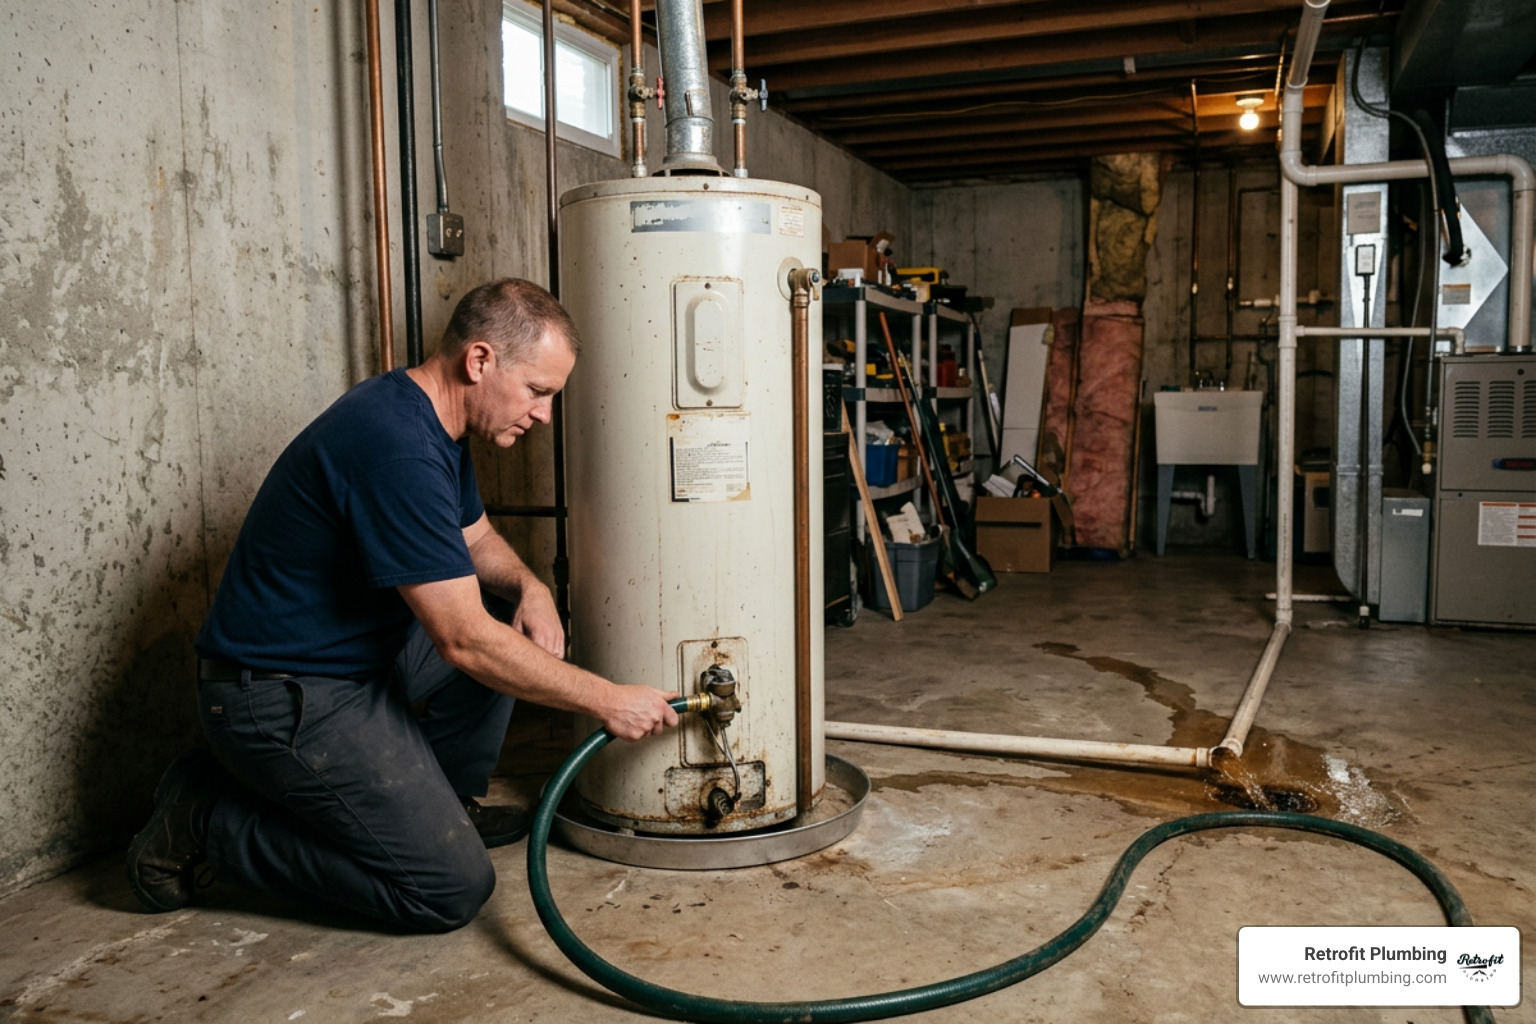
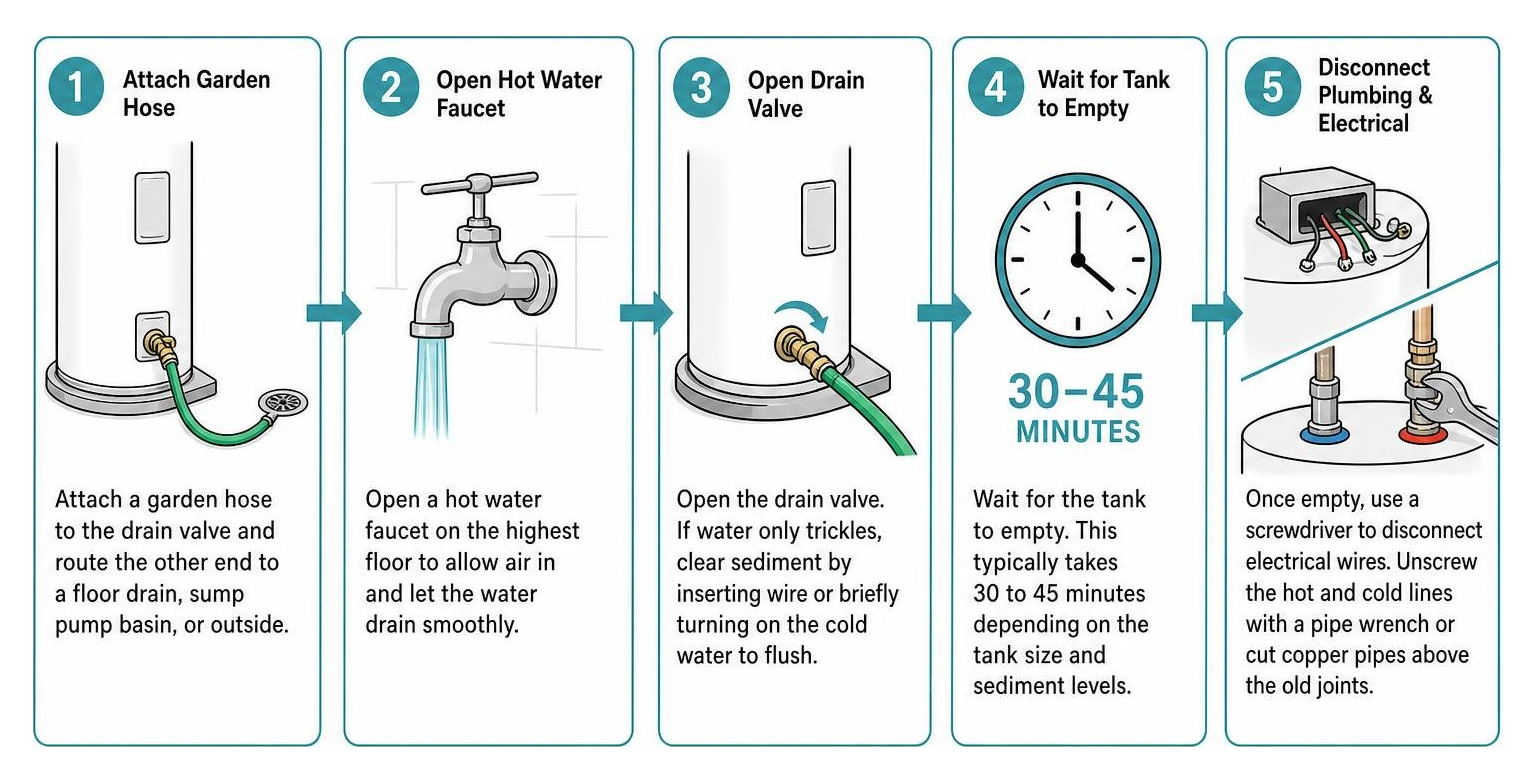
- Attach a standard garden hose to the brass or plastic drain valve at the bottom of the water heater. Route the other end of the hose to a nearby floor drain, a sump pump basin, or outside to your yard.
- Open a hot water faucet on the highest floor of your home. This allows air to enter the plumbing system, breaking the vacuum and letting the water drain smoothly.
- Open the drain valve on the water heater. If the water only trickles out, sediment is likely blocking the valve. You can try carefully clearing the blockage by inserting a straight piece of wire or coat hanger into the valve opening, or by briefly turning the cold water supply valve back on to let water pressure blast the sediment loose.
- Wait for the tank to empty. This typically takes 30 to 45 minutes depending on the tank size and sediment levels.
- Disconnect the plumbing and electrical lines. Once the tank is empty, use a screwdriver to disconnect the electrical supply wires from the junction box on top of the heater. Unscrew the hot and cold water supply lines using a pipe wrench, or cut the copper pipes cleanly above the old joints using a tubing cutter.
Positioning, Leveling, and Plumbing Your New Appliance
With the old tank removed and the area cleaned, it's time to set up your new electric water heater. This stage requires precision to ensure the tank stands perfectly stable and won't put stress on your plumbing connections.
If you are curious about the labor involved in this step, taking a look at the typical Labor Cost to Install Water Heater can help put the physical effort of moving and aligning these heavy tanks into perspective.
Positioning and Leveling the Tank
- Place the new drain pan on the floor, aligning it so the drain outlet is positioned near your floor drain or drain line.
- Carefully lift and position the new water heater into the center of the pan. Because these units are heavy and awkward, always use an appliance dolly or get a helper to assist you.
- Align the tank so the electrical junction box and the front thermostat access panels are facing forward, giving you easy access for future maintenance.
- Check for level. Place a carpenter's level across the top of the tank in multiple directions. If the tank tilts, slip heavy-duty plastic shims under the bottom edge of the tank—never under the pan itself—until the unit stands perfectly plumb.
- Install your seismic straps. Wrap the metal strapping around the upper and lower thirds of the tank, anchoring them securely to the adjacent wall studs. This is a critical safety step to meet local building codes in Washington.
Installing a New Electric Water Heater Plumbing Lines and Heat Traps
Proper plumbing connections prevent leaks and maximize energy efficiency. To get a visual sense of how these components route, you can reference this manufacturer-approved Water Heater diagram.
To connect your water lines:
- Install heat trap fittings. Many modern water heaters come with these pre-installed, but if yours didn't, thread them into the hot and cold ports on top of the tank. Use Teflon tape and pipe dope on the threads. These fittings prevent hot water from migrating out of the tank when it isn't in use, saving you money on your monthly energy bill.
- Connect the cold water inlet. Thread a flexible corrugated stainless steel or copper connector onto the cold water port (marked with a blue ring). Connect the other end to your cold water supply line. If you are working with copper pipe, you can use high-quality push-fit fittings like SharkBite Max for a secure, solderless connection. Just ensure the copper pipe is cut square and cleaned thoroughly with emery cloth first.
- Connect the hot water outlet. Repeat the process for the hot water port (marked with a red ring), connecting it to your home's main hot water supply line.
- Use dielectric unions if you are connecting copper pipes directly to steel tank nipples. This prevents galvanic corrosion, which occurs when dissimilar metals touch and can cause your pipes to leak within just a few years.
Mounting and Maintaining the Temperature and Pressure (T&P) Relief Valve
The Temperature and Pressure (T&P) Relief Valve is the single most important safety feature on your water heater. If the tank overheats or experiences dangerous pressure spikes, this valve opens to release water and prevent a catastrophic tank rupture.
- Wrap Teflon tape clockwise around the threads of the new T&P valve and screw it into the dedicated port on the side or top of the water heater tank. Tighten it securely with a wrench so the outlet points downward.
- Attach a discharge pipe to the valve outlet. This pipe must be made of an approved material like copper or CPVC, must run downward without any upward bends, and must terminate approximately 6 inches above the floor or directly over a suitable floor drain.
- Never cap or restrict the end of this discharge pipe. It must remain open to gravity drainage at all times.
Completing the Electrical Connections and Powering Up
Now that the plumbing is secure, you can tackle the electrical connections. Working with high-voltage electricity requires extreme care and strict adherence to safety protocols.
If you run into any unexpected wiring issues or if your breaker trips immediately during this step, refer to our Water Heater Emergency Repair Guide for troubleshooting assistance.
Wiring and Grounding the 240-Volt Circuit
- Feed the electrical cable(typically 10-gauge solid copper wire for a standard 30-amp circuit) through a strain relief clamp and into the junction box on top of the water heater.
- Connect the ground wire. Attach the bare copper or green ground wire to the green grounding screw inside the junction box. Proper grounding is essential to prevent electrical shocks.
- Connect the power wires. Electric water heaters do not use a neutral wire. Connect the two hot wires from your home's supply circuit (usually one black and one red, or sometimes black and white labeled with electrical tape) to the black and red wires inside the water heater's junction box.
- Secure the connections using high-quality wire nuts and wrap them with electrical tape. Replace the metal junction box cover.
Filling the Tank and Testing for Leaks Before Powering On
CRITICAL WARNING: Never, under any circumstances, turn on the electrical breaker before the water heater tank is completely full of water. Doing so will cause "dry firing," which burns out the upper heating element in a matter of seconds, requiring a complete replacement of the element before you even get your first drop of hot water.
To fill the tank safely:
- Open the cold water supply valve above the water heater. You will hear water begin to rush into the tank.
- Open a hot water faucet in your kitchen or bathroom. At first, you will hear a loud sputtering sound as air is pushed out of the plumbing system.
- Let the water run until the sputtering stops and a steady, uninterrupted stream of water flows from the faucet. This confirms the tank is 100% full.
- Inspect all plumbing joints for leaks. Check the cold inlet, hot outlet, T&P valve, and the drain valve at the bottom of the tank. Wipe the connections dry with a paper towel to spot any slow, weeping leaks.
Adjusting the Thermostat to Prevent Scalding Risks
Water temperatures above 125°F can cause severe burns in seconds. To ensure your family's safety, you must adjust the thermostats correctly. For detailed safety specifications, you can check the manufacturer guidelines in this Hybrid Electric manual.
- Ensure the power is still OFF at the breaker panel.
- Remove the upper and lower access panels on the side of the tank and fold back the insulation to expose the thermostats.
- Use a flathead screwdriver to adjust both the upper and lower thermostats to 120°F (49°C). This is the industry-recommended temperature that provides plenty of hot water for showers and appliances while drastically reducing the risk of scalding.
- Replace the insulation and metal covers before restoring power at the breaker panel.
Post-Installation Care and When to Call the Experts
Once your new water heater is up and running, a little routine care will keep it operating efficiently for its entire 10-to-15-year lifespan.
If you'd like to protect your investment without the hassle of DIY maintenance, our team at Retrofit Plumbing offers comprehensive water heater services. You can learn more about booking a professional checkup on our Plumber Water Heater Replacement page.
To help you decide whether to tackle this project yourself or leave it to the professionals, we've put together a direct comparison:
DIY vs. Professional Installation Comparison
| Feature / Task | DIY Installation | Professional Installation (Retrofit Plumbing) |
|---|---|---|
| Average Time | 4 to 8 hours (or a full weekend) | 2 to 4 hours |
| Permit & Code Compliance | Homeowner must research and apply | Handled completely by the installer |
| Tool Requirements | Must buy or rent specialized tools | Fully stocked trucks with professional gear |
| Warranty Protection | Risk of voiding if installed incorrectly | 100% satisfaction guarantee and certified work |
| Safety Risks | High (240V electricity & pressurized water) | Zero risk to the homeowner |
| Physical Effort | High (moving heavy tanks, draining sediment) | Handled by a two-man professional crew |
Long-Term Maintenance Tasks for Peak Performance
To keep your new electric water heater running like a dream, add these simple tasks to your annual home maintenance checklist:
- Annual Flushing: Over time, minerals settle at the bottom of your tank, insulating the lower heating element and reducing efficiency. Connect a garden hose to the drain valve once a year and flush out a few gallons of water to wash away sediment.
- Anode Rod Inspection: The anode rod is a sacrificial metal rod that attracts corrosive elements in the water, protecting your steel tank from rusting. Check this rod every 3 to 5 years and replace it if the wire core is exposed.
- T&P Valve Test: Gently lift the lever on your T&P relief valve once a year to ensure water flows freely through the discharge pipe, then let it snap shut. If it continues to weep or doesn't open, replace the valve immediately.
When to Hire a Professional for Installing a New Electric Water Heater
While a straightforward swap is a viable DIY project for an experienced handy homeowner, there are several situations where calling in a professional plumber from Retrofit Plumbing is the smartest choice:
- Electrical Panel Upgrades: If your home's electrical panel is outdated, lacks a dedicated 30-amp breaker, or if you are converting from a gas water heater to an electric model, you need a licensed professional to run new lines safely.
- Complex Spatial Constraints: If your water heater is located in a tight attic, crawlspace, or finished closet, maneuvering a heavy tank and routing complex venting or drainage lines requires professional expertise.
- Lack of Specialized Tools: Buying copper cutters, pressure gauges, and high-quality wrenches can quickly add up. If you don't plan to use these tools again, hiring a pro is often more economical.
If you are weighing your options, you can check out our detailed guide on Hot Water Heater Installation Cost to see how professional installation fits into your household budget.
Frequently Asked Questions about Water Heater Installation
Before we wrap up, let's answer some of the most common questions homeowners ask when installing a new electric water heater. For more troubleshooting and repair insights, check out our Common Water Heater Repair Tips.
How long does it take to install a new electric water heater?
A professional plumber can typically complete a standard electric water heater replacement in 2 to 4 hours. For a DIYer, the process usually takes 4 to 8 hours, depending on how long it takes to drain the old tank and whether you run into corroded pipes or electrical challenges.
Can I use push-fit fittings on copper pipes?
Yes! High-quality push-fit fittings (such as SharkBite Max) are fully approved by code for water heater installations. They are a fantastic option for DIYers because they eliminate the need for soldering. Just make sure the copper pipe is cut completely square, deburred, and cleaned with emery cloth before pushing the fitting into place.
Why is my new water heater larger than my old 10-year-old model?
Federal energy efficiency standards updated in 2015 require manufacturers to use much thicker insulation around the storage tank. As a result, a modern 50-gallon water heater is often 1 to 2 inches wider and taller than an older model of the same capacity. Always measure your installation space before buying a replacement!
Conclusion
Whether you are spending your summer weekends enjoying the Covington Days festival, boating on Lake Meridian, or gearing up for another exciting Seahawks season, having a reliable supply of hot water is essential for a comfortable home.
If you're ready to upgrade your home's comfort but want to skip the heavy lifting, electrical risks, and permit paperwork, the team at Retrofit Plumbing is here to help. We proudly serve Covington, Renton, Kent, Bellevue, and the surrounding South Sound communities with honest pricing, fully stocked trucks, and a 100% satisfaction guarantee.
Don't let water heater worries stress you out. Head over to our Services Water Heater Repair page or give us a call today to schedule your seamless, professional installation!