Anatomy of a Kitchen Sink: Parts, Sizes, and How They Work Together
Kitchen plumbing is one of the hardest-working systems in your home — and one of the easiest to overlook until something goes wrong.
Here's a quick overview of what you need to know:
| Topic | Quick Answer |
|---|---|
| Standard drain pipe size | 1.5 inches (branch lines: 2 inches) |
| Most common drain parts | Strainer, tailpiece, P-trap, extension tubes |
| Typical under-sink parts cost | ~$21 (range: $2.48–$266) |
| Best drain material | Schedule 40 PVC/ABS with solvent cement |
| Top maintenance tip | Monthly baking soda + vinegar flush |
| When to call a pro | Leaks, gurgling, backups, or appliance installs |
Whether you're dealing with a slow drain in a Covington craftsman or a leak under the sink of a Bellevue townhouse, the same basic system is at work. Water comes in through supply lines, gets used at the faucet, and exits through a drain assembly that — according to one plumbing expert — is bound to leak sooner or later in 99% of homes.
The good news? Most kitchen plumbing problems are fixable without breaking the bank. This guide covers everything from parts and installation to leak prevention and smart maintenance — so you can make confident, cost-effective decisions.
I'm Josh Klimp, and over my 20+ years owning and operating a plumbing company focused on both commercial and residential work, kitchen plumbing has been one of the most common — and most misunderstood — systems I've encountered. In this guide, I'll break it all down in plain language so you know exactly what you're dealing with.
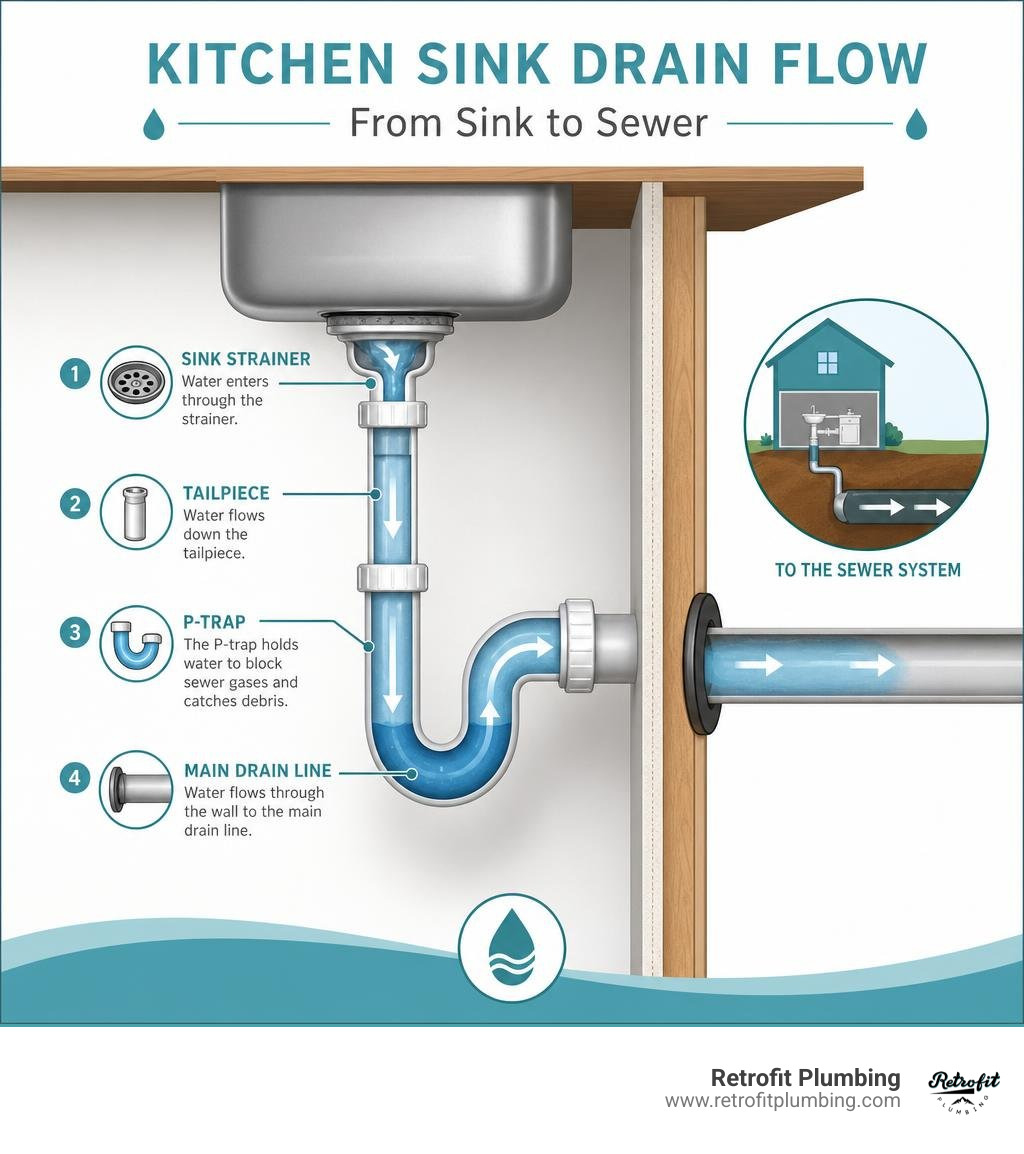
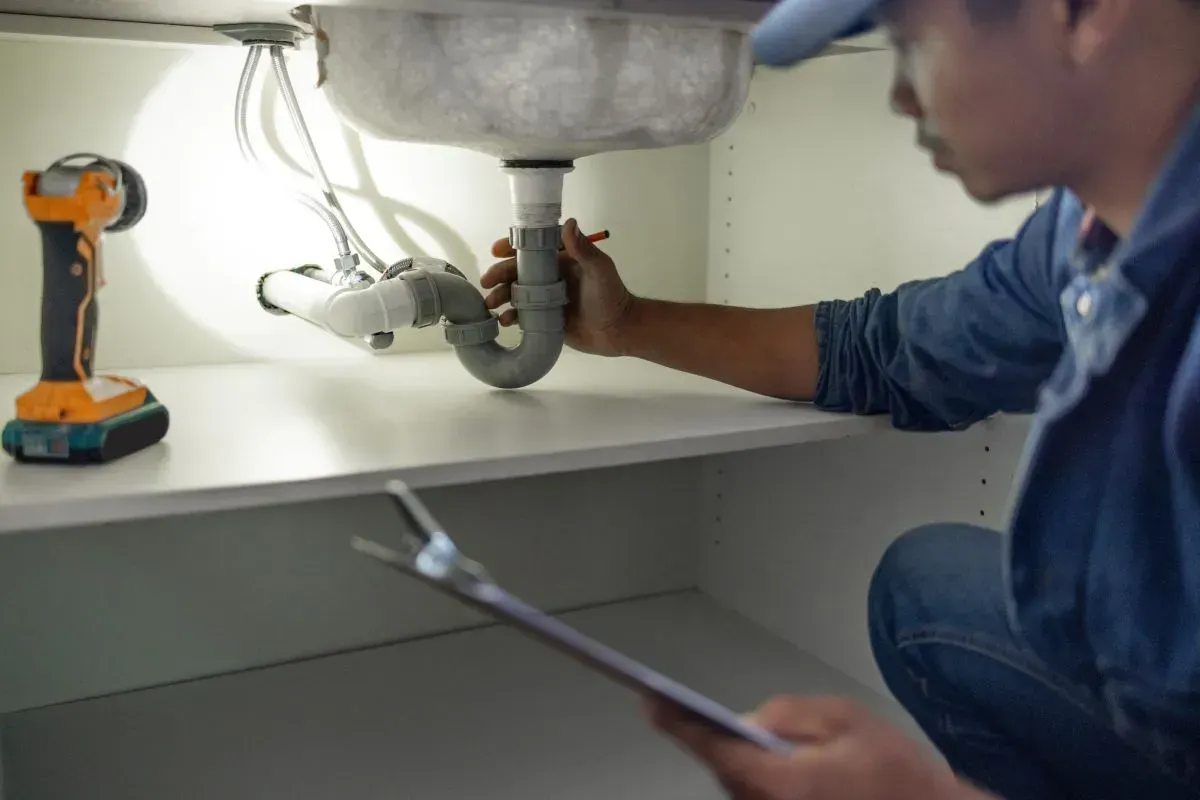
Before diving under the cabinet with a pipe wrench, we need to understand the structural anatomy of what is actually happening beneath your kitchen sink. Think of your under-sink area as a miniature transit system where water must flow quickly, cleanly, and silently without ever escaping.
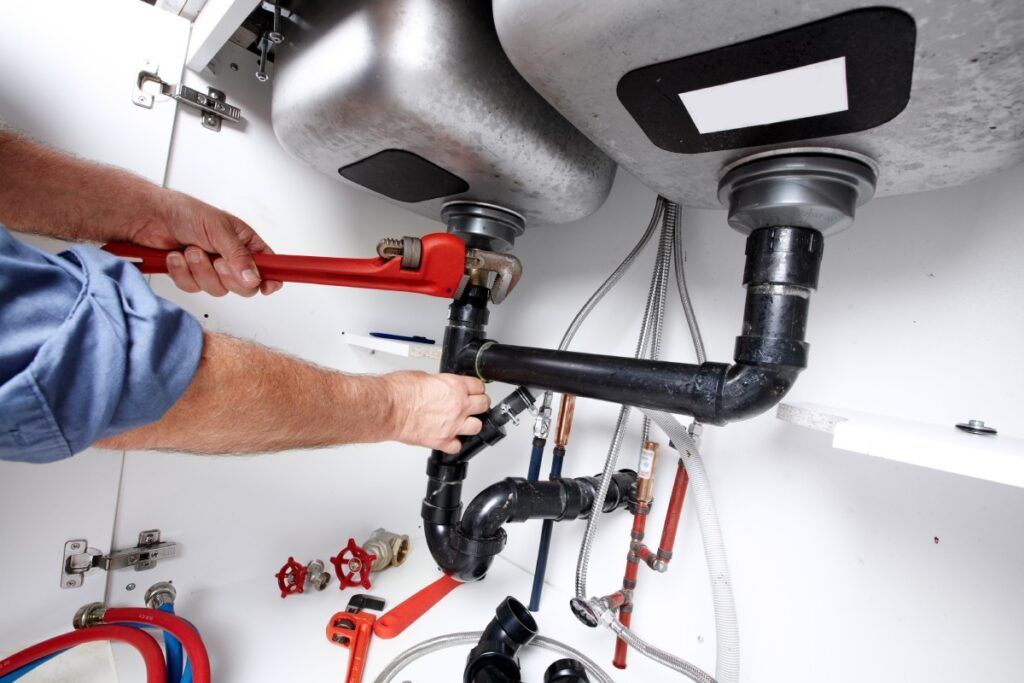
Let's break down the primary players in this system:
- Strainer Basket: This is the metal or plastic insert visible from inside the sink bowl. It catches food scraps and seals the sink when you want to soak dishes.
- Tailpiece: The straight section of pipe that connects directly to the bottom of the strainer basket. It acts as the initial drop-down point for draining wastewater.
- Extension Tubes: These straight pipe segments are used to bridge the physical gap between your tailpiece, your P-trap, and the wall outlet.
- Water Supply Lines: These are usually flexible braided stainless steel or copper lines that connect your hot and cold shutoff valves directly to your kitchen faucet.
To get a complete grasp of how these components work in tandem, you can refer to this Complete guide to kitchen sink plumbing parts.
When it comes to sizing, standard residential kitchen sinks in the United States use a 1.5-inch diameter drain pipe. While bathroom sinks typically use a slightly smaller 1.25-inch setup, the kitchen demands a larger diameter to handle food particles, grease, and high-volume drainage from dishwashers and garbage disposals. On the water supply side, you will typically find 1/2-inch supply lines feeding into 3/8-inch compression fittings at the faucet.
Choosing the Right P-Trap and Tailpiece for Your Kitchen Plumbing
The P-trap is the unsung hero of your home's sanitary system. It is a curved section of pipe that holds a small, permanent pool of water. This water acts as a physical barrier, blocking dangerous and foul-smelling sewer gases from rising out of the sewer line and entering your kitchen.
When choosing a P-trap and tailpiece, you have two primary material choices: plastic (polypropylene or PVC) and brass.
- Plastic (Polypropylene/PVC): Extremely affordable, highly resistant to chemical corrosion, and incredibly easy to cut and adjust. For most homeowners, plastic slip-joint P-traps are the go-to choice because they use hand-tightened slip-joint nuts and rubber washers to create a seal.
- Brass: Highly durable and aesthetically pleasing if you have an exposed-sink setup, but much more expensive and difficult to install or adjust.
If you are planning an upgrade or a complete basin overhaul, checking out our Kitchen Sink Replacement Guide 2026 will help you coordinate your sink basin choice with the proper trap configuration. Regardless of the material you choose, always ensure you use high-quality bevelled slip-joint washers. When the slip-joint nut is tightened, it compresses this washer against the pipe to form a watertight seal. If the washer is backwards or cracked, a leak is virtually guaranteed.
DIY vs. Professional Kitchen Plumbing: Step-by-Step Drain Assembly Installation
Can you handle a kitchen drain assembly installation yourself? Absolutely! If you have a few basic tools, a bit of patience, and don't mind squeezing into your under-sink cabinet, it is a highly rewarding DIY project.
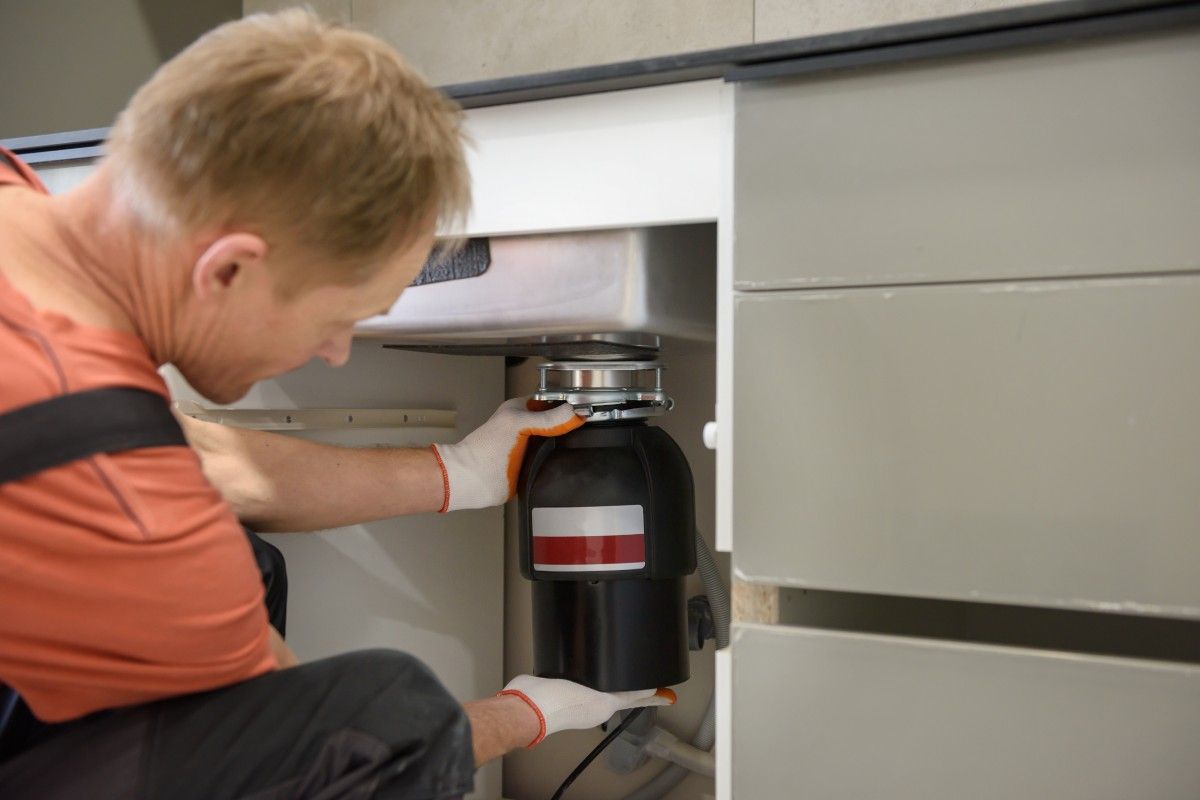
Here is our tried-and-true step-by-step process for replacing a kitchen sink drain assembly:
- Prep the Sink: Clean the area around the drain hole thoroughly. Any old plumber's putty, silicone, or grime must be completely scraped away so the new components can seal properly.
- Apply Plumber's Putty: Roll a golf-ball-sized piece of plumber's putty between your hands until it forms a consistent rope about 1/4-inch thick. Lay this rope in a continuous ring around the underside of the new strainer flange.
- Insert the Strainer: Press the strainer firmly down into the drain hole from the top of the sink. Some putty will squeeze out around the edges — leave it there for now.
- Secure from Below: From underneath the sink, slide the rubber gasket onto the strainer body first, followed by the cardboard friction ring. The cardboard ring is crucial because it allows the metal locknut to spin smoothly against the rubber gasket without binding or tearing it.
- Tighten the Locknut: Thread the large locknut onto the strainer body. Use a pair of slip-joint pliers or a dedicated basket strainer wrench to tighten it. Hold the strainer from above with a second tool if it starts to spin. Tighten until snug, but do not overtighten, as this can crack plastic sinks or warp thin stainless steel.
- Clean and Connect: Wipe away the excess putty that squeezed out into the sink bowl. Finally, install your tailpiece washer and thread the flanged tailpiece onto the bottom of the strainer.
For a deeper dive into how these fixtures connect to your home's structural framing, read through this guide on Pipes, drains, and fixtures explained.
Connecting Your Dishwasher and Garbage Disposal Safely
If you are running a modern kitchen, you likely have to integrate a dishwasher and a garbage disposal into your drain system. Doing this incorrectly can lead to dirty dishwasher water backing up into your clean dishes, or worse, flooding your cabinet.
First, let's talk about the high loop method versus an air gap. An air gap is a small cylinder mounted on top of your sink that physically separates the dishwasher drain hose from the sink drain, preventing siphoning. If your local building codes in Western Washington do not strictly require an air gap, you can use the high loop method. This involves routing your dishwasher drain hose up to the very top of the under-sink cabinet, securing it there with a strap, and then running it back down to the disposal or tailpiece connection. This high loop uses gravity to prevent sink water from back-flowing into your dishwasher.
When connecting a dishwasher drain hose to a brand-new garbage disposal, there is one critical step that DIYers frequently miss: knocking out the drain plug. Inside the disposal's inlet tube is a plastic knockout plug. If you do not tap this plug out with a screwdriver and hammer (and fish the plastic piece out of the grinding chamber!), your dishwasher will not be able to drain, resulting in an immediate error code or pool of standing water.
Once the plug is removed, slide the dishwasher hose onto the disposal nib and secure it tightly using a stainless steel hose clamp. If you prefer to bypass the DIY headache entirely, our team offers professional Garbage Disposal Installation Repair Service to get your kitchen appliances running seamlessly.
Slip-Joint vs. Schedule 40 Welded Drains: Which is More Cost-Effective?
When you walk into a local hardware store in Covington or Bellevue, you will find two completely different styles of drain pipes: thin-walled plastic slip-joint kits and thick, heavy-duty Schedule 40 PVC or ABS pipes.
While slip-joint kits are the standard DIY option because they can be assembled in minutes without glue, they are inherently prone to shifting, cracking, and leaking over time. Schedule 40 pipes, on the other hand, are permanently welded together using solvent cement.
Here is a head-to-head comparison to help you decide which is right for your budget and longevity goals:
| Feature | Thin Slip-Joint Plastic | Schedule 40 PVC/ABS Welded |
|---|---|---|
| Material Cost | Low (~$15 - $25 per kit) | Moderate (~$20 - $40 in parts) |
| Installation Difficulty | Very Easy (No glue, hand-tightened) | Moderate (Requires cutting and gluing) |
| Durability | Low (Washers degrade; joints can slip) | High (Virtually indestructible welded joints) |
| Access for Cleaning | Easy (Unscrew nuts by hand) | Requires a Union Trap or Rubber Coupler |
| Lifespan | 3 to 5 years before leaks occur | Decades of leak-free performance |
While a Schedule 40 system takes longer to install, a welded assembly with a union trap (a threaded joint that allows you to remove the trap loop for cleaning) and a rubber coupler is the gold standard of kitchen plumbing. Over the long run, investing an extra hour of labor and a few dollars in Schedule 40 parts is far more cost-effective than repeatedly replacing ruined cabinet floors from failed slip-joint washers.
Preventing and Fixing Leaks Under Your Sink
A slow, undetected leak under a kitchen sink can quietly cause hundreds of dollars in structural damage before you even notice a puddle.
Because kitchen cabinets are often constructed from particleboard or thin plywood, standing water quickly leads to warped wood, peeling laminate, and musty odors. Even worse, the damp, dark environment beneath your sink is the perfect breeding ground for toxic mold.
To prevent this, make it a habit to inspect your under-sink cabinet once a month. Look for:
- Water stains or discolored wood beneath pipe joints.
- Dampness on the cabinet floor or musty smells.
- Corrosion or green buildup on copper pipes and shutoff valves.
If your pipes are already showing signs of advanced corrosion, warping, or persistent leaks, it may be time for an overhaul. You can explore the typical costs involved in our guide to the Cost to Replace Pipes Under Kitchen Sink.
Budget-Friendly Maintenance Tips for Kitchen Plumbing
Keeping your drains clear and odor-free does not require expensive, harsh chemical cleaners. In fact, chemical drain openers are highly corrosive and can actually eat through your metal pipes or weaken plastic slip joints over time.
Instead, use these highly effective, budget-friendly maintenance habits:
- The Baking Soda & Vinegar Flush: Once a month, pour 1/2 cup of baking soda down your drain, followed by 1/2 cup of white vinegar. Let the natural fizzing action break down grease and soap scum for 15 minutes, then flush the drain with a kettle of boiling water.
- Weekly Hot Water Flush: Simply running hot tap water down your drain for 2 to 3 minutes after doing dishes helps keep oils moving through the pipes rather than solidifying on the pipe walls.
- Avoid FOG (Fats, Oils, and Grease): Never pour cooking grease down your sink. It solidifies instantly when it hits cool underground pipes, creating stubborn blockages. Instead, let grease cool in a can and throw it in the trash.
- Use Drain Screens: A simple, inexpensive mesh screen over your drain opening catches food particles before they ever enter your P-trap.
If you are already dealing with a stubborn clog that water won't clear, check out our Clogged Sink Repair Complete Guide or view our pricing guide to understand the Cost to Unclog Kitchen Sink.
Frequently Asked Questions About Kitchen Drainage
What is the standard pipe size for a kitchen sink drain?
The standard diameter for a kitchen sink drain pipe is 1.5 inches. This size provides the optimal balance of flow rate and velocity to ensure food debris is carried away without clogging. However, the horizontal branch pipe behind the wall that your sink connects to is often 2 inches in diameter to accommodate the combined flow of your sink, dishwasher, and other nearby fixtures.
For a complete visual breakdown of how these pipe sizes transition from your cabinet to your home's main sewer line, take a look at this Kitchen Sink to Main Line Plumbing Diagram Guide.
Why does my kitchen sink gurgle when the toilet flushes?
If your kitchen sink gurgles, bubbles, or smells like sewer gas when you flush a nearby toilet, you are experiencing a venting issue. Every plumbing fixture in your home requires air to drain smoothly. This air is supplied by vent pipes that run up through your roof.
When a vent stack becomes blocked — often by leaves, bird nests, or PNW evergreen needles — the rushing water from a toilet flush creates a vacuum. To fill this vacuum, the system sucks air through the nearest available opening: your kitchen sink's P-trap. As the air is pulled through the trap, it makes a gurgling sound and siphons out the protective water barrier, letting sewer odors escape. In tight spaces or kitchen island remodels where routing a pipe to the roof is difficult, plumbers will often install an Air Admittance Valve (AAV) under the sink to allow air in while keeping sewer gases out.
How much does it cost to replace pipes under a kitchen sink?
If you choose the DIY route, a basic plastic slip-joint under-sink plumbing kit typically costs around $21 at local hardware stores, with individual fittings ranging from $2.48 to $15.
However, if your plumbing requires rerouting, valve replacements, or Schedule 40 welding, hiring a professional is often the safest way to protect your home from water damage. Professional labor rates for under-sink pipe replacement typically range from $150 to $500 depending on the complexity of the job. If you are planning a larger kitchen upgrade, you can budget accordingly by reviewing our breakdown of the Cost to Replace Kitchen Sink and Faucet.
If you need local assistance, our team at Retrofit Plumbing is proud to serve homeowners throughout the Puget Sound region, including Covington, Renton, Kent, Tacoma, Seattle, Auburn, Bellevue, and Kirkland.
Conclusion
At Retrofit Plumbing, we know that dealing with kitchen plumbing issues can be stressful. Whether you are tackling a simple DIY P-trap replacement or need a complete line repair, our goal is to make the process as straightforward and affordable as possible.
Based proudly in Covington, WA, we serve our neighbors here and in surrounding communities like Bellevue, Renton, Kent, and beyond. We stand behind our work with honest pricing, fully stocked trucks to get the job done right on the first visit, same-day service for those unexpected emergencies, and a 100% satisfaction guarantee.
When you need reliable, professional help with your kitchen pipes, drains, or appliances, don't hesitate to reach out to us for our dedicated Kitchen Plumbing Services. We are here to keep your home's water flowing smoothly!